Lesson learned

Jan 31, 2011


In the eighth grade I took a career assessment test that determined I would do well in high crisis jobs, like being a paramedic. I don't normally panic in stressful situations.  In the medical field, I can see how this is handy, but, as an artist, I rarely find myself having to make quick, imperative decisions.  Enter Saturday, late evening at my work desk.  I was nearly finished with a new mixed media piece and just had a few more details to add.  I needed a minuscule amount of blue and noticed that the paint bottle was clogged.  I was tired and impatient, so instead of digging out the dried up paint, I gave the bottle a good squeeze.  (You can see where this is going.)  Phthalo blue bursts out of the bottle across my desk and art work! 

After the initial disbelief and feeling of utter stupidity passed,  I realized there was no use in crying over spilled milk, or paint in this case.  There were two options: either let the paint dry or wipe it up as quickly as possible.  As you can see from the photo, I opted for the latter.  I proceeded to salvage the work the next day.  This is what it looks like now.


I'm pretty happy with it, but the test prints have not turned out at all.  The subtle color changes in the sky are not showing up on the prints.  I'm thinking about adding a blue hue to the border and darkening the sky. 

Until I figure out what to do next, I decided to at least use part of the composition to create new business cards and notecards.  


My husband says that the moral of the story is to make lemonade out of lemons. I say, don't squeeze the clogged paint bottle!


Art and vintage sale this Saturday!

Jan 27, 2011


Seeing that I don't facebook or twitter, I thought I'd let all the Portland readers know that I'm throwing an art/vintage/designer sale with a friend this Saturday.  We're both huge vintage lovers, but my friend is the one with the much coveted cache of collectibles, like that amazing horse head wall vase! We're also selling the very last of our store's inventory and fixtures, from artisan-crafted dressing room mirrors to cute red vegan flats.

I'll be bringing many of my prints and originals to the sale- all discounted for the special event.  If you think you'll be able to make it to the sale this Saturday (it's in SW Portland), just send me an email and I'll give you the details.  My email is catmcmurray[at]gmail.com.

I look forward to seeing some of you there!

Transforming ordinary objects into incredible works of art


I love it when artists take something that is familiar and create a new experience for the viewer.  Take these beautiful woven pieces made by Canadian artist Brian Jungen.  Can you believe they were made from professional sports jerseys?

At first glance, Jungen's sculptural works look like a contemporary homage to Native American art.  But when you realize his art is fashioned from found objects, particularly sports paraphernalia, the meaning of his work becomes even that much more profound.  


In the photos above, one can clearly recognize totem poles and an indigenous mask, items that hold sacred significance in the Native American culture.  When you look closely though, you can see that Jungen uses golf bags to form the totems and Nike Air Jordans to create the mask.  It's a brilliant statement of today's professional sports culture and how it's become a ritualistic, almost spiritual tradition for the masses.


Baseball mitts were used to create this warrior-like gear, and on the right is an antler sculpture made from leather shoes. 


Jungen works with a variety of materials, including metal, fabric, wood, and plastic.  Here are two works of art created from plastic objects.  The igloo shaped piece is made from trash bins and the whale skeleton from plastic lawn chairs.  Amazing!

[images courtesy of the artist, Casey Kaplan Gallery, and Catriona Jeffries Gallery]

To listen to Jungen talk about some of these works, go here.

Handpainted push pins now available

Jan 23, 2011


Here's the complete set- yeah!  I finished the last two of the six designs a few days ago.  The trickiest part of this whole project actually involved the packaging.   This afternoon, after playing around with some ideas, I decided that little jewelry boxes would best protect the pins in shipping. 

There are only five sets available (that was all I could make with the number of wood markers I had).  I might make more if I buy another batch of wood pieces, but I'm going to focus on some other projects for now. 

To see my Etsy listing, go here

My Week

Jan 22, 2011


I found this little glass jar at an antique store and knew immediately what I wanted to do with it.  I took it home, painted some lines on it, and created a home for a tiny plant. 


I'm going to be an aunt again! More sweet cheeks to kiss and snuggle.  I already started on a baby blanket using scrap yarn from other crochet projects. 


Yummy sushi for mommy and daughter date.  One of our favorite family spots is Sushi Takahashi in Portland's Duniway neighborhood. 

The lowlight this week was the downpour of rain last weekend that caused water to come into our basement.  This video captures how fierce the nearby rivers can be after excessive rainfall. 
 

Artists and their creative spaces

Jan 20, 2011

Betsy Walton's art desk at home.  [image source: Poketo]

One of my favorite things about following other blogs is getting to take a peak into the lives and creative spaces of artists. The photo above was taken in the home studio of Portland artist Betsy Walton.


Against the wall is this shelf that houses Betsy's art and materials.  I've been looking for some kind of shelving unit for storing larger sheets of paper, and I have to say this is a brilliant solution (and one that seems relatively affordable).


Matte Stephens, another Portland artist, just posted this photo of his creative space on his blog.  I dig the midcentury look, and the retro glasses sitting on the sketchbook is a nice touch!  Even if I didn't know whose studio this was, I would have guessed it belonged to Matte Stephens. 


Good light is a much coveted feature in an artist studio, and it looks like Heather Smith Jones has some beautiful light to work in.  I love all the little photos and works of art just randomly placed on the white wall.  

Etsy also puts together some fantastic videos on artists, featuring their creative processes and spaces.  This one showcases artist Hollie Chastain, aka Dr. Kennedy Jones.

Third time's a charm

Jan 17, 2011


I just finished this mixed media on birch panel titled walk on the beach.  It's been quite the journey with this particular wood panel.  This is actually the third art work on the wood panel.  I experimented with different finishes with previous compositions and ended up having to strip them from the panel with an xacto knife.  I talk more about this process here and here.

This process of taking away and adding creates a very textured surface.  You can see some of the carved and layered details in the photo below. 


I've been thinking a lot about the beach lately.  I take it as a sign that I need to go back soon.  When I think about my last trip to the Oregon coast in November, I remember it like walk on the beach.  The beach grass had a lovely golden hue and the ocean and sky seemed to blend into one. 

To read more about my latest work, go to my Etsy listing here


I'm still painting on these old bingo markers I found on Etsy.  In addition to magnets, my friend suggested that I make them into push pins.  I loved the idea, and I happened to have a box of flat head tacks on hand! I'm wanting to sell the hand painted push pins as a set of six, so I need to come up with a couple more designs.  My guess is that I'll have the first batch ready in my Etsy shop within the week. 

Coe & Waito's porcelain perfection

Jan 14, 2011


For years, I've been drooling over coe&waito's beautifully made ceramic items.  Based in Toronto, partners Alissa Coe and Carly Waito have been hand sculpting and slip casting collectible pieces since 2005.


One of my favorite sets are these antique inspired bottles. Each porcelain bottle is dressed with nature-themed decals.  So charming!

In addition to product design and production, coe&waito have created some amazing installations.  I am in awe of this display of hand formed jellyfish. 


A couple more installation projects . . .


You can view all of coe&waito's large scale and custom work here.  While you're on their website, check out these photos under "process"  . . .  I've got studio envy big-time. 

Tools for the Etsy seller

Jan 11, 2011

Just a few of the many apps for the Etsy enthusiast.
 
I came across a great article today, "Top ten etsy web apps," written by Ashley Jennings for Design Sponge.  You might be familiar with the app Ashley and her husband designed, Favoritizer, which is a fan favorite among Etsy followers.

Ashley's post on Etsy apps is full of helpful information. If you happen to have your own Etsy shop, the article is truly a must-read.  Being the tech geek wannabe that I am, I already downloaded a couple of the apps found here, and I can't wait to try out new apps like Craftsy.  Anything to make the online shop experience more seamless gets a big thumbs-up from me!

Okay, back to right brain talk . . .

My Week

Jan 9, 2011


The ideas are still flowing, and I can't wait to get started on a few of them.  I'm so happy to see that the whale is hearted by many.  For many months, the whale sat on our piano, and the girls had gotten attached to it.  Once I painted it, they loved it even more and didn't want me to put it in my Etsy shop. But I told them that's part of being an artist.  You want to share what's special to you with others.

I think this is why I like to dedicate some time packaging my sold pieces.  In many cases, it's my last time to look at an original work.  It can be sentimental, but in a very good way.  I'm always proud to see one of my pieces shipped off to a new place. 


This package is headed overseas.  I love that my art gets to go to places that I only dream of going to one day.  


After the whirlwind of the holidays, it's been nice to get back into a routine.  One of the sweeter moments this week was when my daughter and her friend dressed up as princesses (a common choice of play), and twirled around and around in our kitchen.  Lots of girly giggles to warm the heart.  If only those sounds could be captured in a locket!  

New one-of-a-kind items in my Etsy shop

Jan 7, 2011


My art process this week was full of ups and downs.  I'll talk about one of my bummer moments in a bit, but let's start with the positives.  I took a few pieces from my personal beach collection and decided to dress up the objects with some fun designs.  (The rock and shell were from my last trip to the Oregon coast.)


I'd like to experiment more with painting on nontraditional surfaces like rock or glass.  I especially love the idea of painting on reclaimed or found objects.  Remember the wooden whale I talked about in this post?  I finally got around to working on it this week, and here's the finished product:


All four items shown above have been added to my Etsy shop in the "Exclusives" section.  I really should call the collection "one-of-a-kinds that I create once in a blue moon," but I opted for the shorter title. 


Speaking of blue moon, this was supposed to be my newest mixed media work to reveal, but then there was a major mishap.  If you look closely, especially in the middle of the piece, you can see some of the color running.  I was experimenting with an acrylic medium as a top coat and learned the hard way that it doesn't mix well with other media.  Sigh.

I've already stripped the drawing from the birch panel and have started a new painting.  You can see the start of it in the picture below (top right).  Yes, welcome to the craziness of my art desk.  When I get into an art making frenzy, I seem to pull everything out and keep it just inches away from my work.  This lasts for a few days and then I can't take the cramped space anymore.     

Interview with artist and art conservator Chris Zahner

Jan 5, 2011

Kathy, a collage by artist Chris Zahner


If I were a Marvel Comics character,  I'd want to be a superhero by night and an art conservator by day.  It'd be nice to know that at the end of a day's work, I saved some lives and a few precious paintings.  My real life doesn't come close to my comic book character, but I recently connected with an artist who at least lives the life of my alter-ego.  Boston-based artist Chris Zahner (even sounds like an alter-ego name), works in art conservation.  Since I really don't know much about art conservation, Chris was kind enough to answer a few of my questions.

How did you get into art conservation?

One of the many interesting aspects about the field is the seemingly endless ways people find it. Art conservation is a melding of art history, studio art and science, so people come from all kinds of backgrounds. Studio art is my angle. I have a BFA from the Cleveland Institute of Art in ceramics with a minor in drawing.  Through the encouragement and support of a few conservator friends my interest in the field began.  My first conservation job was at a regional lab in Cleveland called the Intermuseum Conservation Association where I was the preparator in their paper department. I became hooked.

Chris at work.

What does a typical day at your work look like?

Like most kids I wasn’t sure what I wanted to do when I grew up, but I had a really good sense of what I didn’t want. Boredom, monotony and cubicles were out. Challenges, problem solving, creativity and a life connected to the arts were in. So far art conservation has been the perfect job for me specifically because there are no “typical” days. One day might be spent logging hours in front of a computer writing reports while the following day might require you to put on a hard hat, climb scaffolding and clean a mural 30 feet up.

[image source: Intermuseum Conservation Association]
What are some things about art conservation that most people don't know?

People don’t realize there is a difference between conservation and restoration. Art conservation and restoration mainly differ in approach. A restorer makes an attempt to return an object as close to its original condition as possible, while the conservator’s primary goal is to prevent further deterioration even if the overall appearance might not look significantly different. Conservation is usually more of a light touch.

There is also a gulf between the two fields in terms of education. Art conservators have a Masters degree in a specific discipline such as paintings, paper, books, sculpture, photographs...etc. because of the increasingly technical nature of the profession.  A restorer is generally an artisan and often a very skilled one, but lacks the formal training that a conservator would.  That’s not to say there aren’t some very capable restorers out there who treat object with great care, but I would take your Old Master etching or first edition books to a conservator who specializes in that particular discipline.

Before and after pictures of one of Chris' conservation projects.


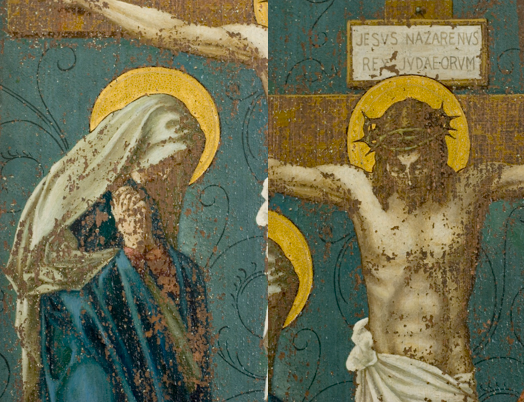
What has been the most fascinating project you've worked on?

This might not be the most fascinating project I’ve worked on, but it might be one of the most dramatic. I received a phone call from a friend of mine who was a private paintings conservator in Dayton, Ohio asking me if I would be interested in helping him with a large project. A local chapel had hired him to help with their 14 station of the cross paintings. Painted by an art student from the Dayton Art Institute these paintings were executed on copper panels and showed various degrees of flaking and missing paint.

The brown color is the copper panel showing through.


Flaking paint was attached to the panel using a heat activated adhesive. We filled in all the valleys where the paint was missing with a conservation putty to insure the painting would have a consistent plane when finished.  All the white spots in the photo below represent where paint was totally missing.


Time for inpainting. Using conservation grade paints all the white areas and ONLY the white areas had to be reconstructed. You would never want to paint over existing paint, only the fills.


This piece is a good example of restoration as a conservation treatment. The painting has been stabilized, further flaking has been deterred and the inpainting does restore the work to something close to its original condition.

Do you have any practical advice for art collectors on how to take care of art?

Your home doesn’t need to be like a museum, but owning original artworks is a responsibility that should be taken seriously. There are conditions that have detrimental consequences to your work that you should be aware of. Light is no friend to paintings and objects on paper, so keep pieces out of direct sunlight and don’t use picture lights. UV glass or plexiglass is great when framing works on paper, but that’s not a green light to hang something across from that giant window in your home. Humidity and large fluctuations in temperature are also a problem, so don’t hang original works in your bathroom or over your fireplace. If you have concerns about specific objects in your home refer to the American Institute for Conservation of Historic and Artistic Works.

Thanks, Chris, for the such a fascinating and informative interview!  To see some of Chris' wonderful original art, check out his Etsy shop here.  He also has a great art blog called Flopslump.  (Catch a recent feature with yours truly here.)

Make your own embroidered portraits of family and friends

Jan 2, 2011


For Christmas, I made embroidered portraits of my nephews and nieces.  The project is more time-consuming than the silhouette portraits, but still relatively easy if you are familiar with embroidery.  Each 5" x 5" portrait took about an hour and a half to complete, which includes framing the work. 


Here is a list of materials and equipment needed to make a 5" x 5" embroidered portrait:

computer with photo editing application
white printer or copy paper
black felt tip pen
10" square of linen fabric
10" x 10" IKEA Ribba frame
black embroidery floss (I used DMC perle cotton 12)
embroidery needle
embroidery hoop
fabric scissors
art tape
iron


Instructions.
1.  Take the mat out of the frame and trace the mat opening onto the white copy paper.  Then, choose a photograph on your computer to use as a template.  If necessary, resize the picture so that it fits within the 5" x 5" mat opening.

2.  Secure the white paper over your monitor with removable tape.  Carefully trace the outline of the portrait with a felt tip pen.

3.  Take your fabric and line drawing to a bright window.  Center the fabric over the portrait and trace the line drawing with a black pen. 


4.  Secure fabric in an embroidery hoop. Using a backstitch, embroider over the line drawing. (Periodically refer to the actual photograph when working on fine details.)


5.  Iron the finished portrait.  You'll want to trim the edges of the fabric so that it can be taped to the back side of the mat. 


6.  Arrange the portrait and mat so that they sit in the back of the frame, like a shadow box.  Secure the back of the frame and you're done!


Since the frame is deep, you can add small memorabilia or decorative details to personalize the portraits even more.  For my nephews and nieces, I painted small wooden letters (just the first letter of each name) that could be glued to the bottom ledge of each frame.  I included the letters with each framed portrait. 

Related Posts Plugin for WordPress, Blogger...